Ergonaut One Build Guide
Assemble your PCB
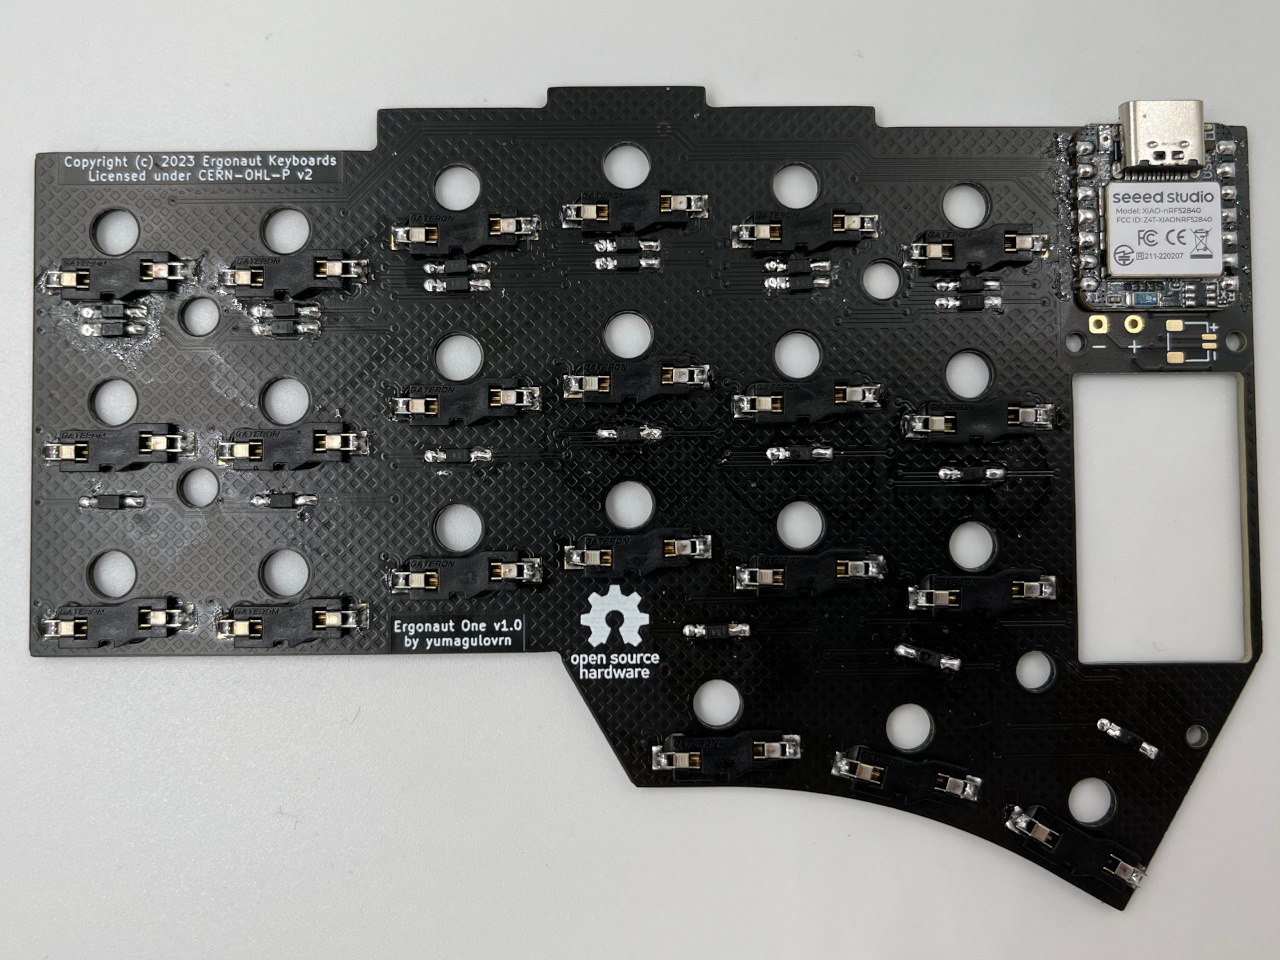
| PCB |
|---|
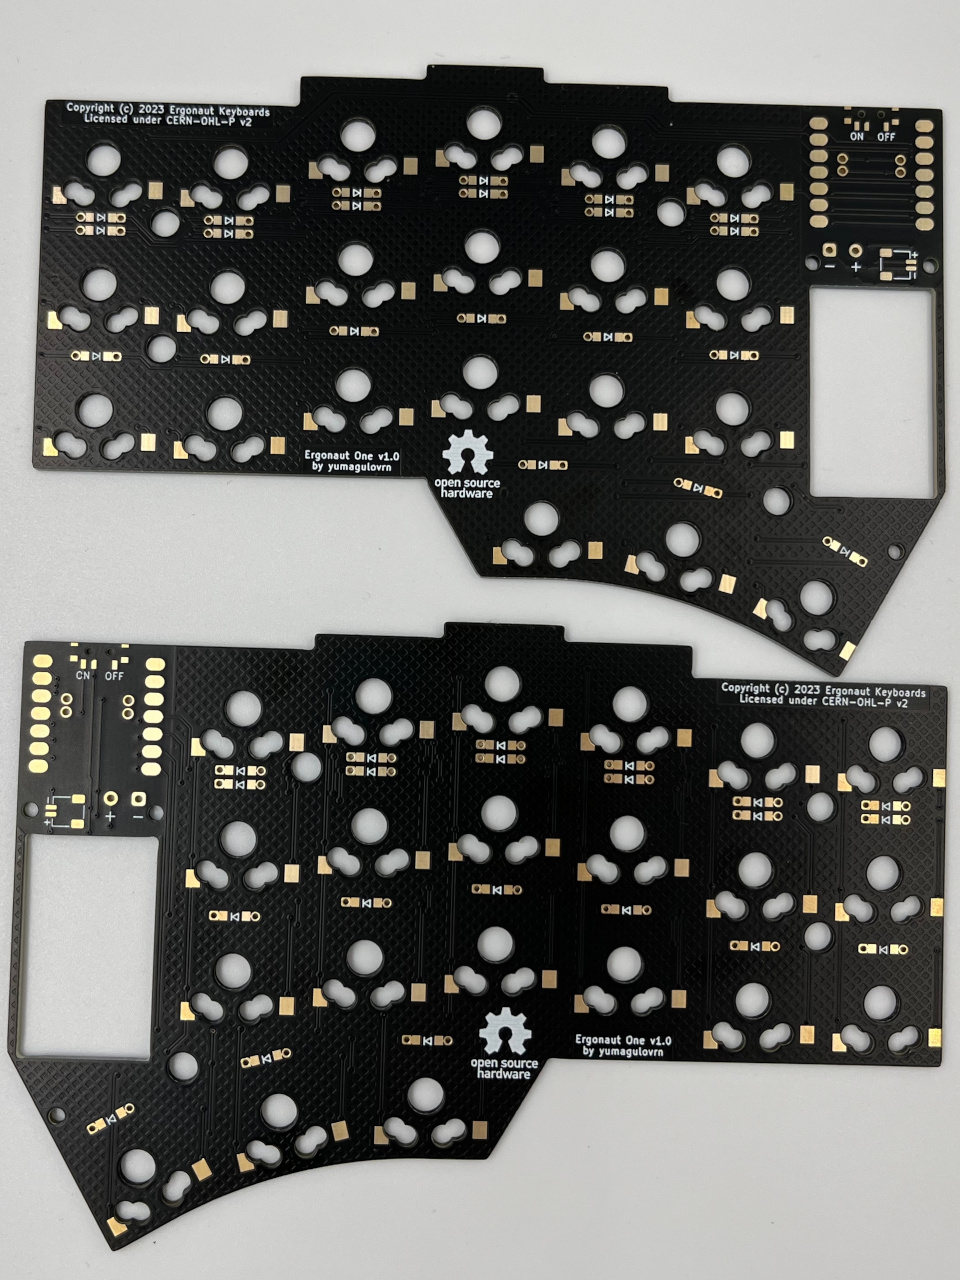 |
You can assemble PCB in two different configurations - either with Xiao on "top", or on the "bottom". Pick a configuration based on the variant of the case you would want to use.
Case compatibility
| Xiao position | Modern Case | Classic Case |
|---|---|---|
| Bottom | ✅ | ❌ |
| Top | ❌ | ✅ |
Soldering
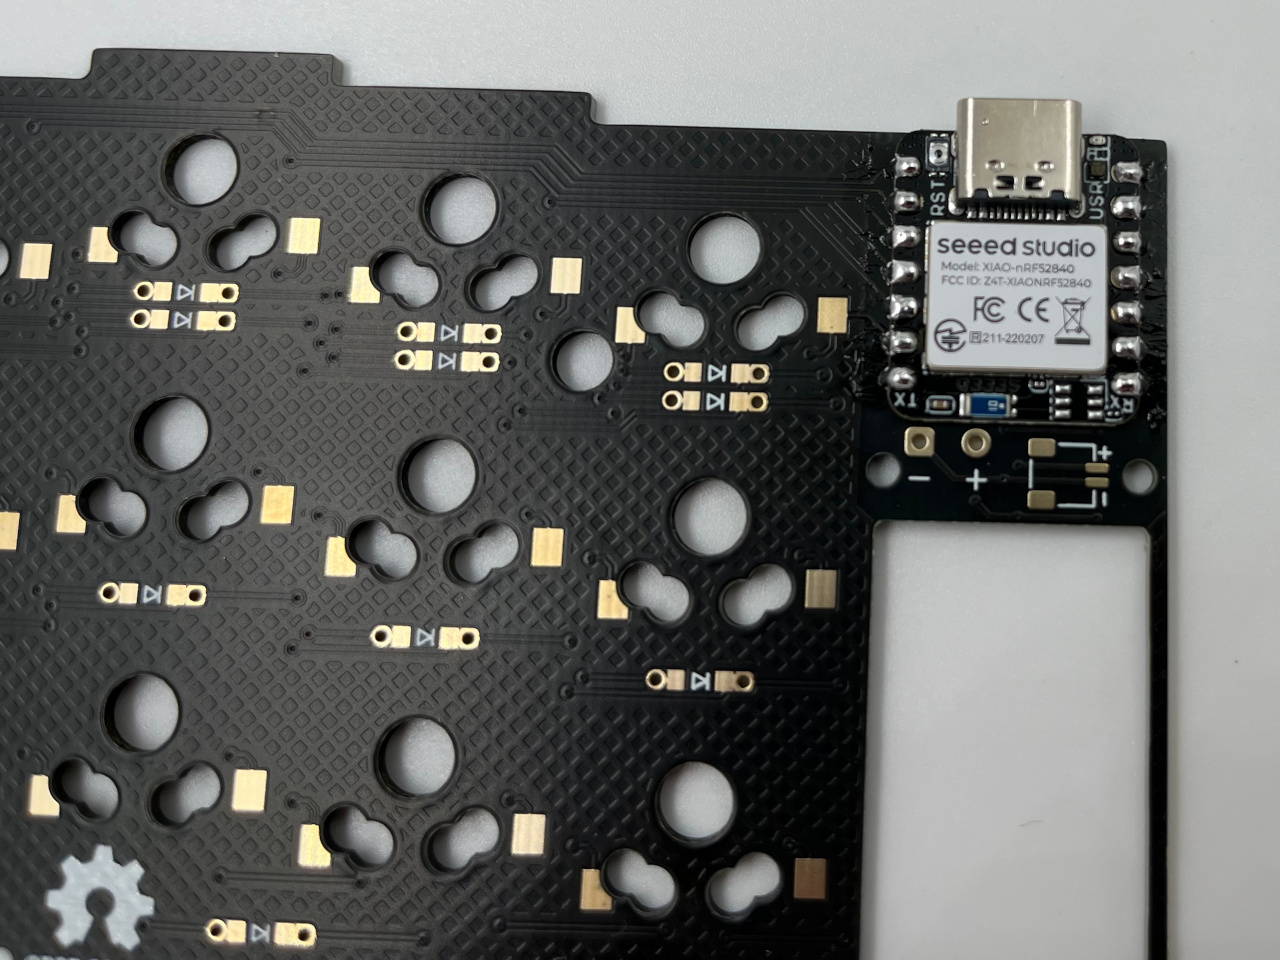
Xiao
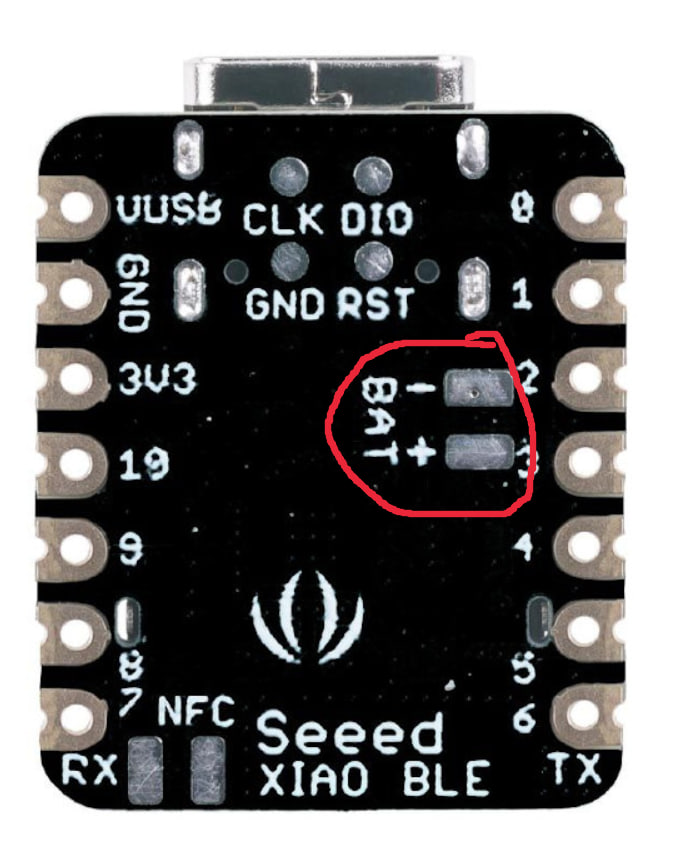
Before soldering the Xiao, please, apply a small amount of solder on the battery pins on the bottom of Xiao. If you applied too much - you can collect the solder to the iron tip with some flux. Xiao shouldn't be skewed on the board!
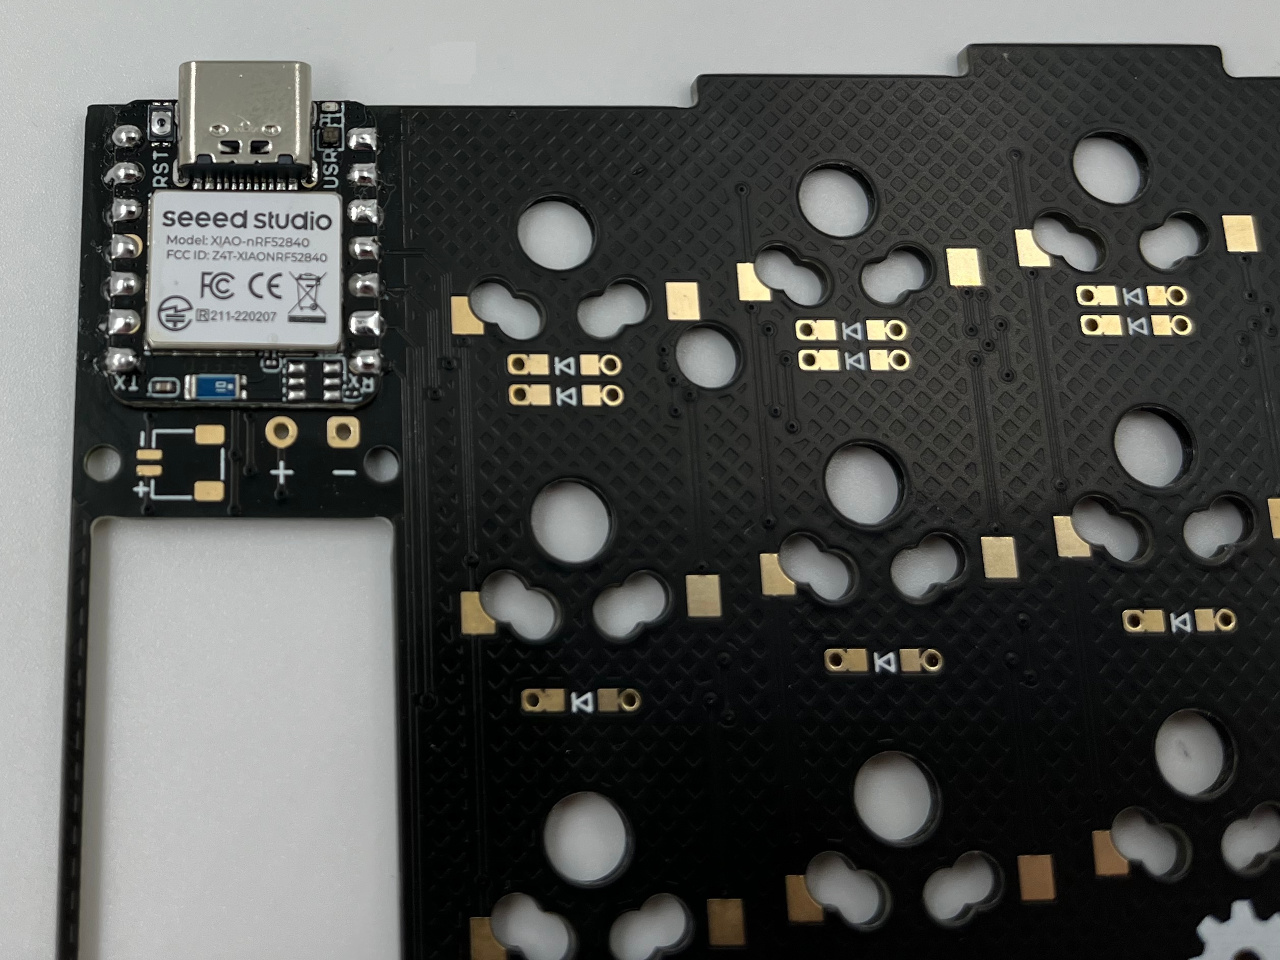
- Position Xiao in its designated place
- Start by soldering two opposite pins
- Solder the rest of the pins
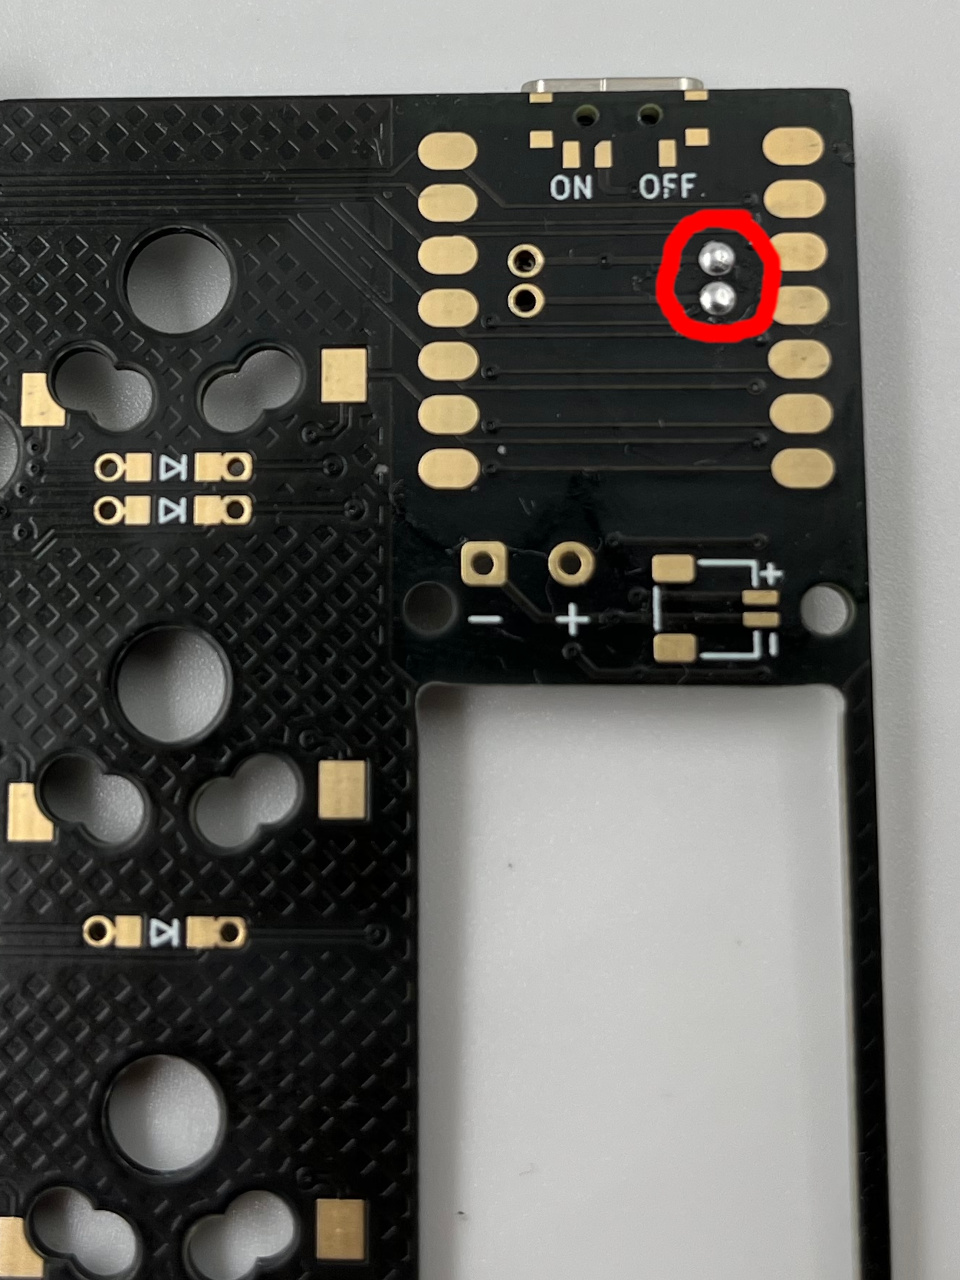
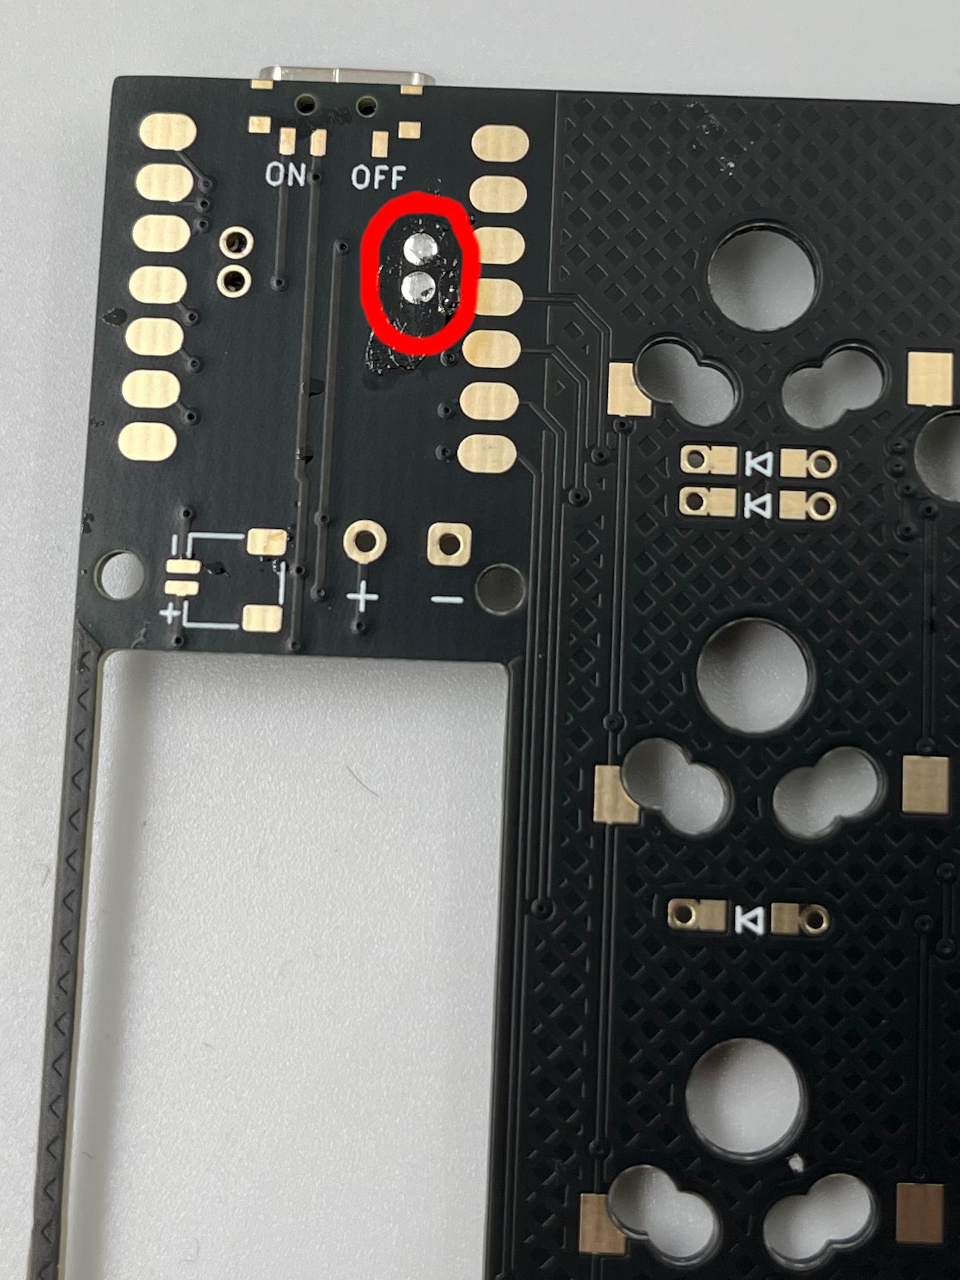
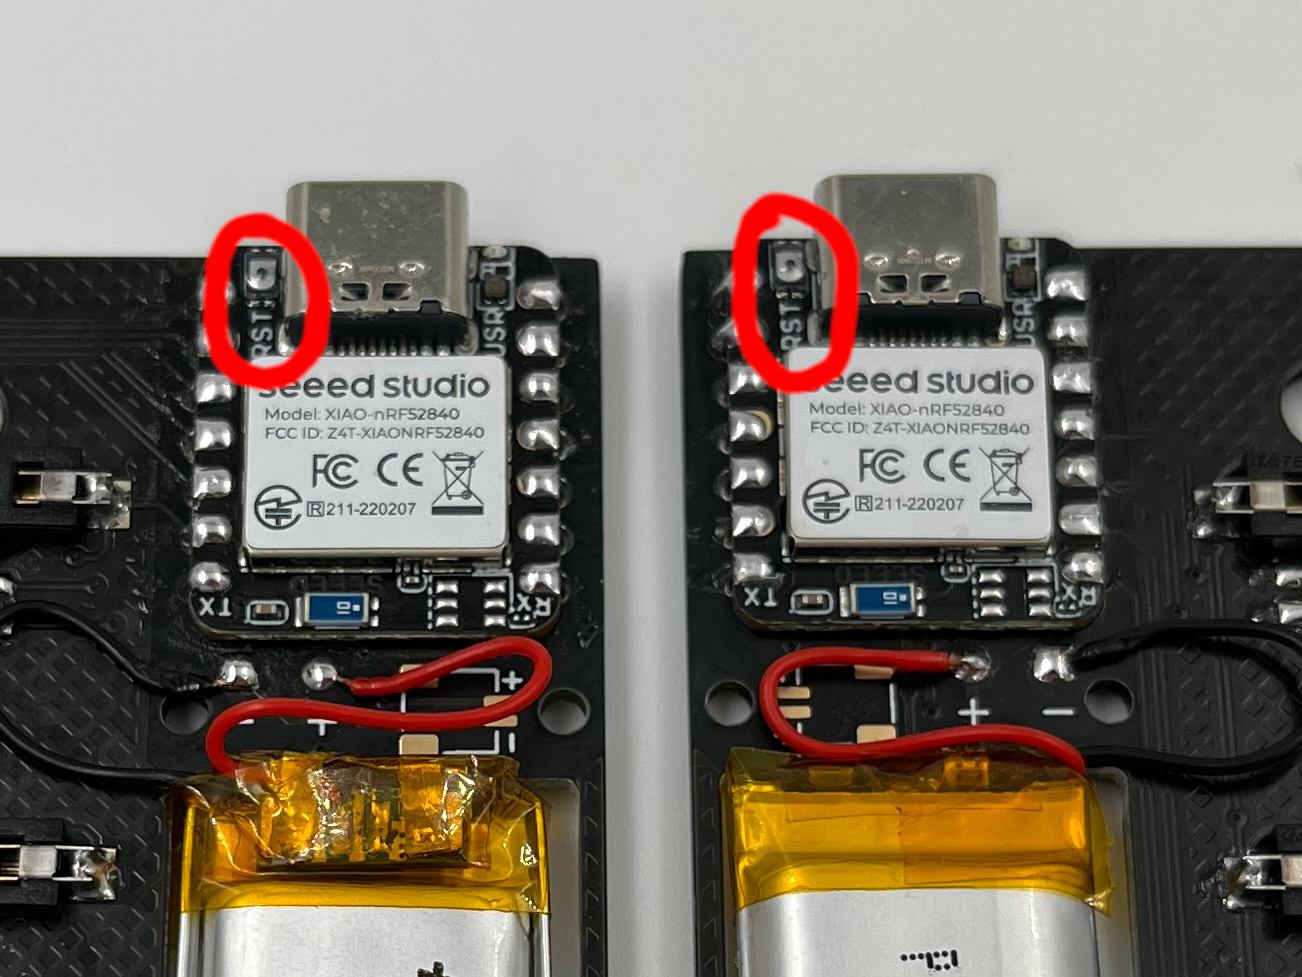
- Flip the board
- Put some flux in the holes (marked by the red circle in the photo), and fill them with solder (you might want to heat those pins a little longer than usual)
| Left | Right |
|---|---|
 |  |
 |  |
Diodes
If you are building a "Bottom Xiao" configuration, diodes should be on the SAME side as Xiao. If you are building a "Top Xiao" configuration, diodes should be on the OPPOSITE side from Xiao.
Please take note that diodes have polarity.

| Left | Right |
|---|---|
 |  |
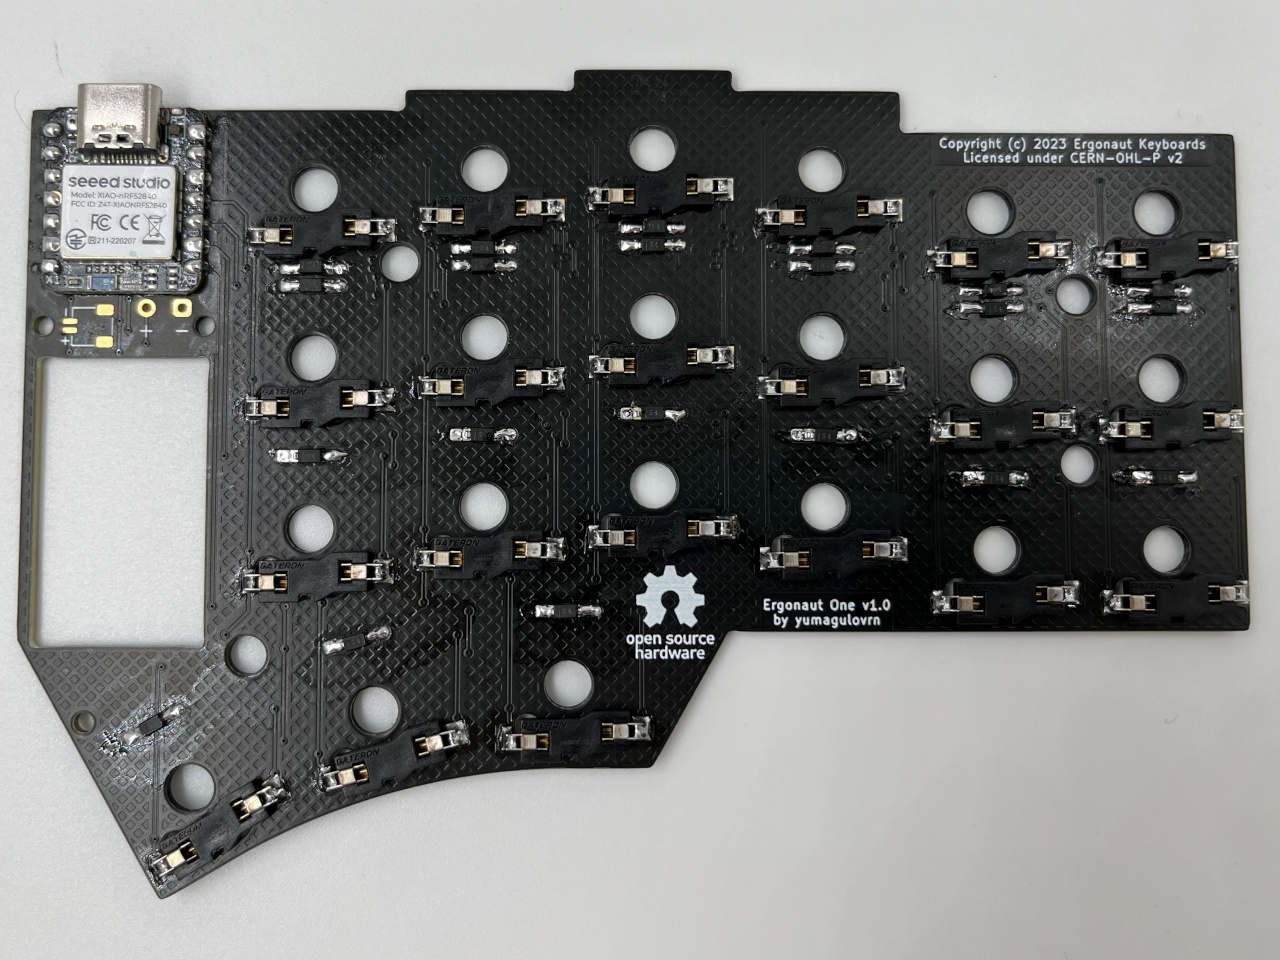
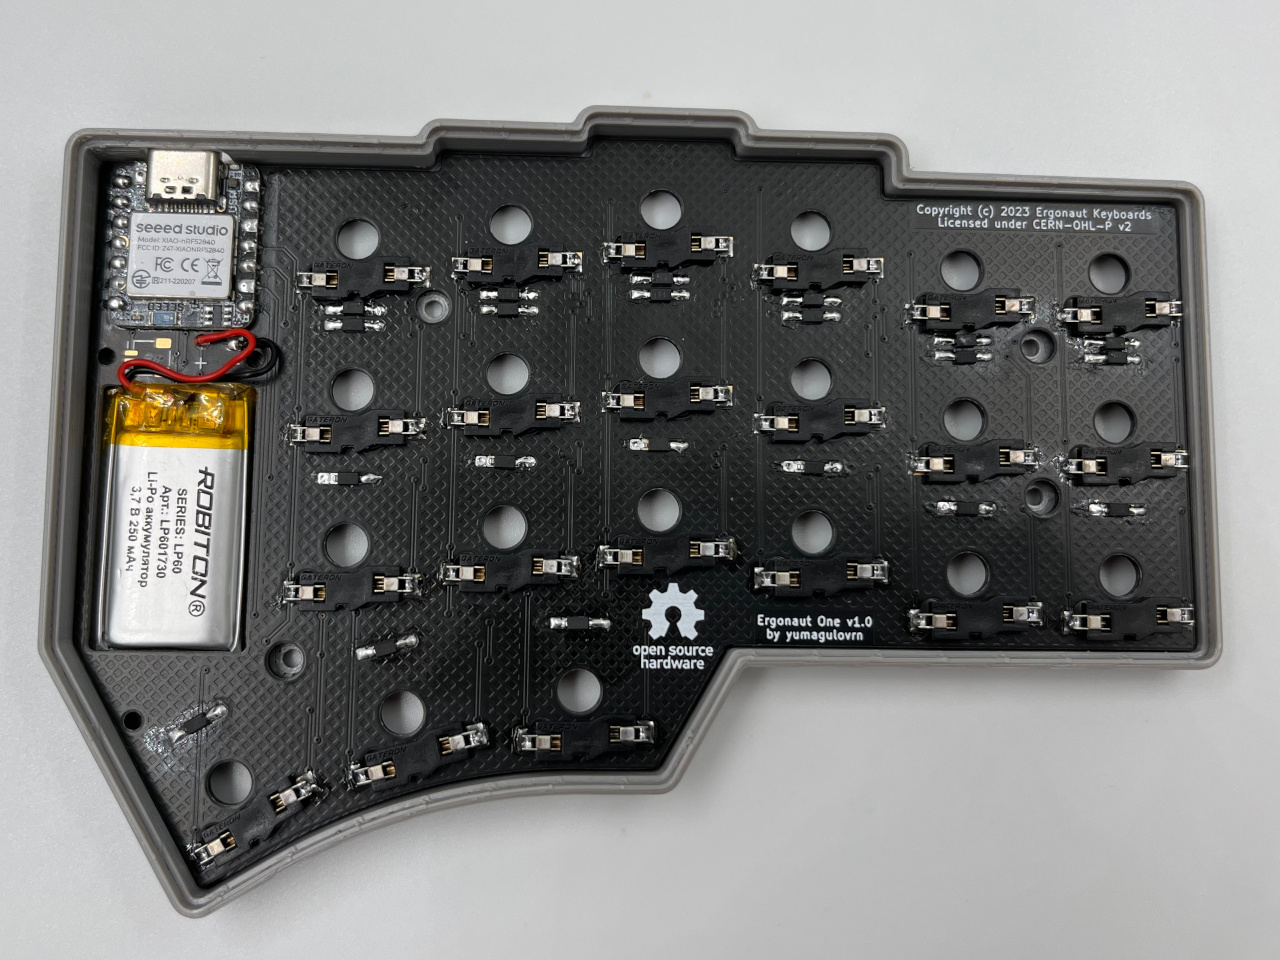
Hotswap Sockets
If you are building a "Bottom Xiao" configuration, sockets should be on the SAME side as Xiao. If you are building a "Top Xiao" configuration, sockets should be on the OPPOSITE side from Xiao.
| Left | Right |
|---|---|
 |  |
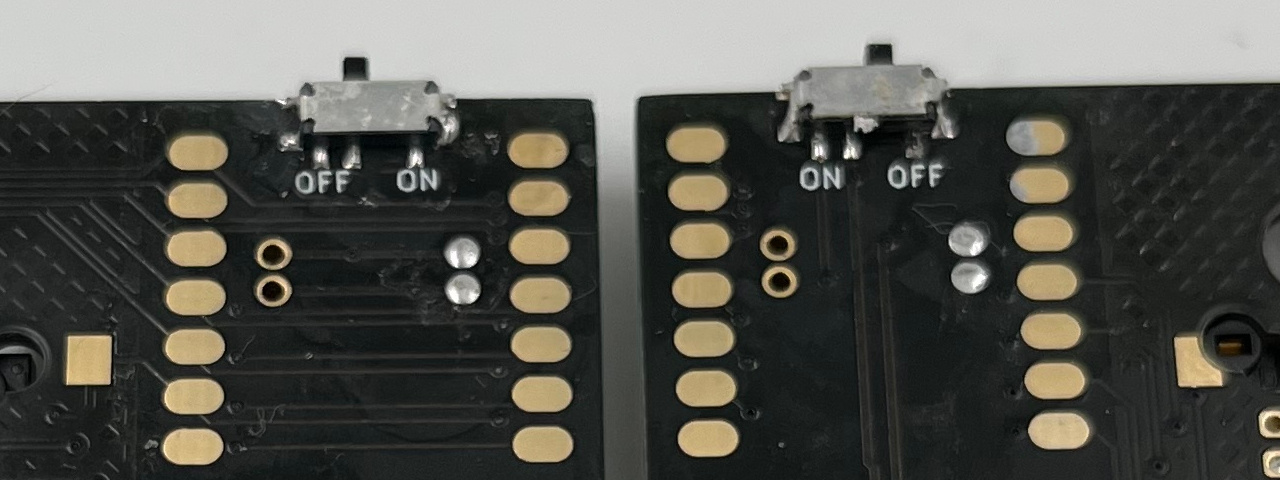
Power Switches
Power switches are always on the opposite side of Xiao.
Test your soldering
If you have a multimeter, test for shorts:
- Between "-" and "+";
- Between GND and 5V on the Xiao;
- Between GND and 3V3 on the Xiao.
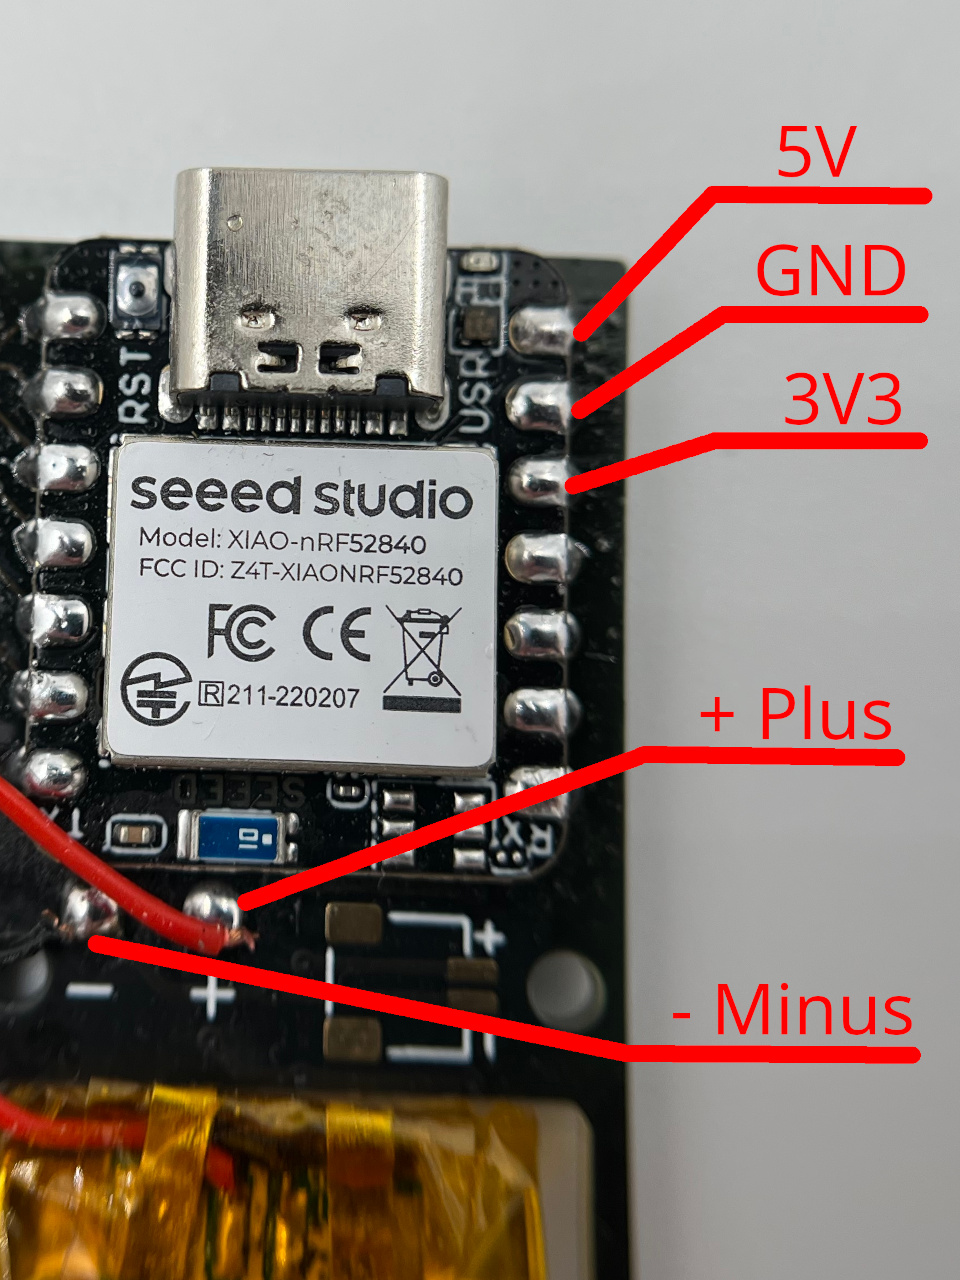
Then connect the battery, turn on the power switch and verify the voltage between GND and 3V3 is 3.3 volts. If the voltage is not there, you probably need to re-solder the underside pads.
If you do not have a multimeter, just proceed with the instructions.
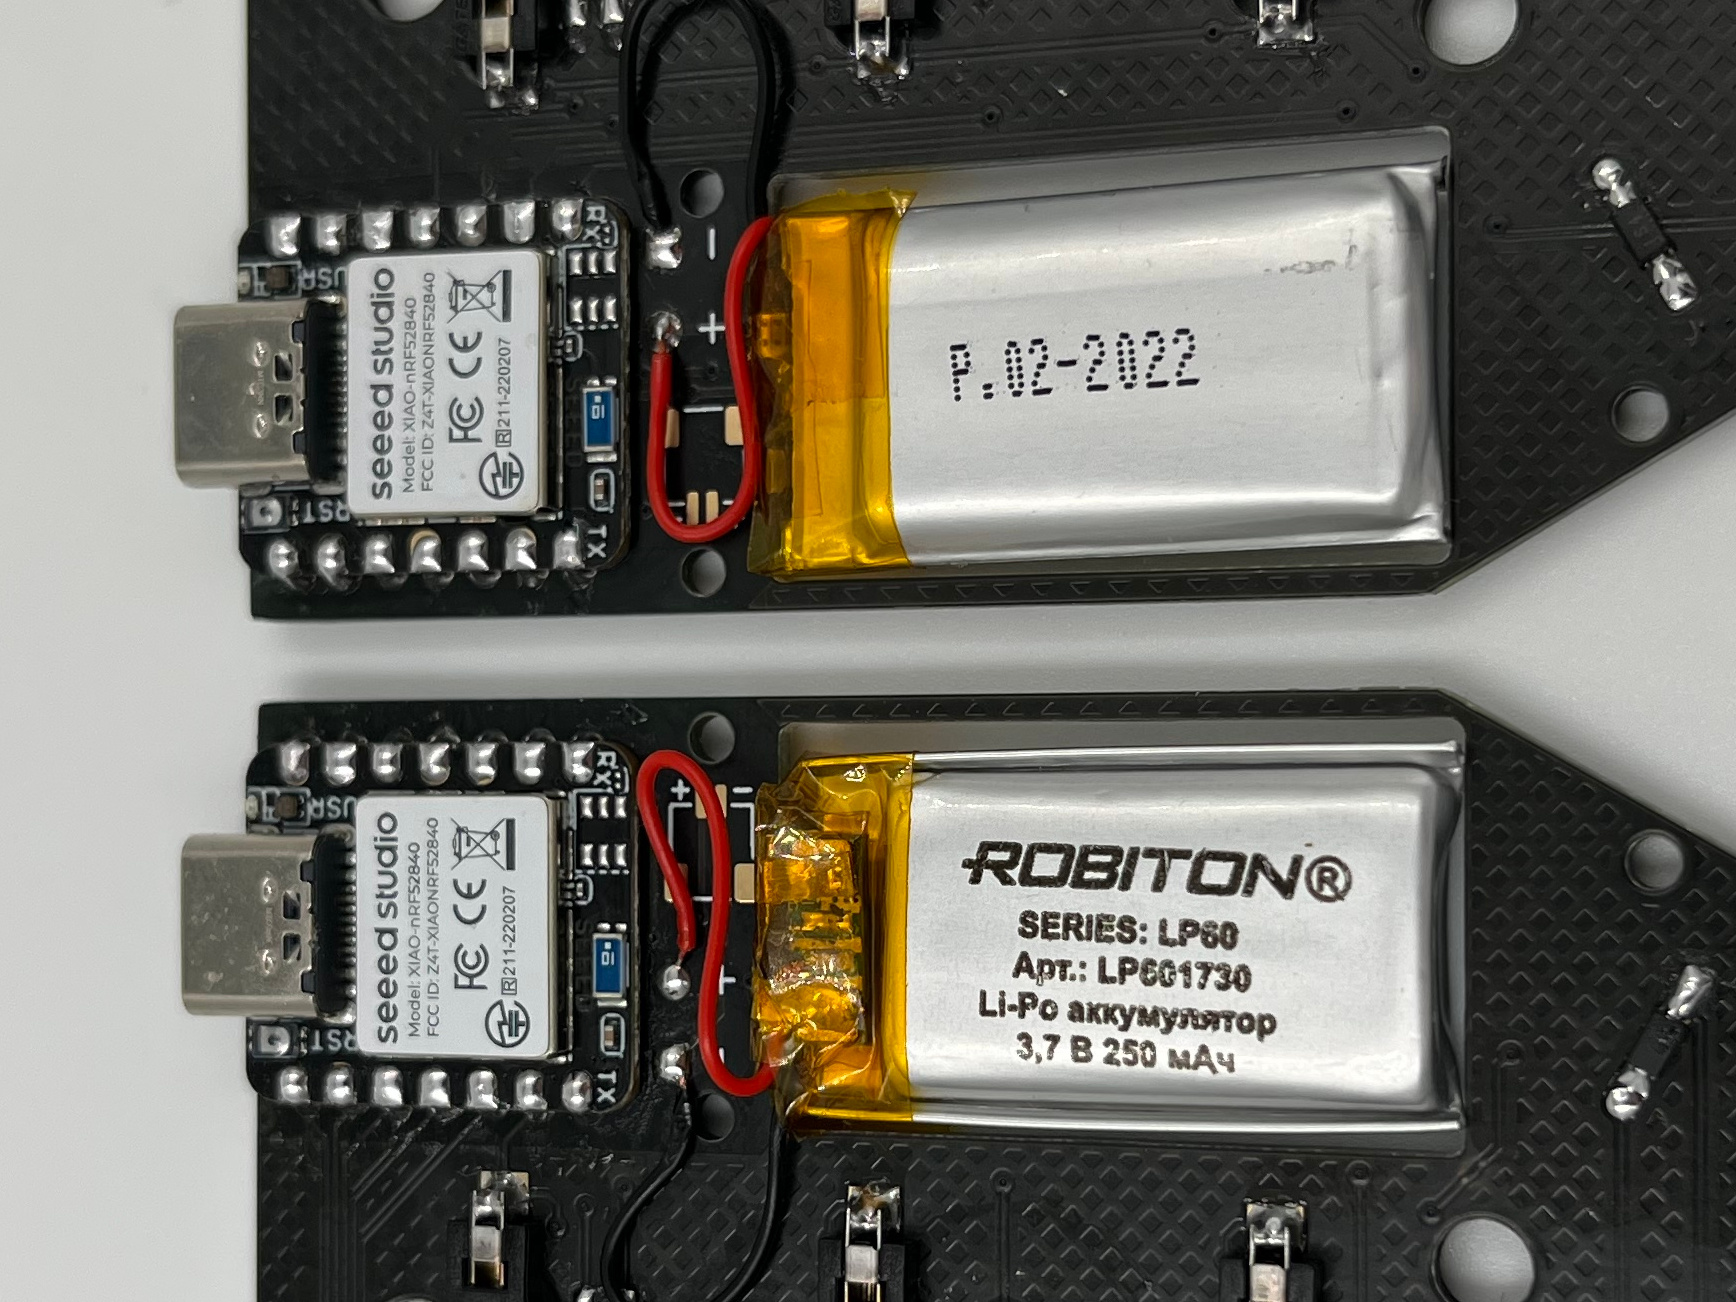
Batteries
You can choose any side for battery wires soldering, but I suggest using the same side as Xiao.
Please take note of battery polarity. Positive wire (red) should go to "+", negative wire (black) to "-".
Clean up
Clean your PCB from flux residues. IPA (isopropyl alcohol) with Q-tips should do the trick.
Flash firmware
Now it's a good time to flash firmware to a keyboard.
- Download firmware and unzip it.
- Repeat for each half:
- Connect the PCB to the PC via USB-C cable;
- Press the RST button twice - you should see a new USB device;
- Copy
ergonaut_one_left-seeeduino_xiao_ble-zmk.uf2for left half orergonaut_one_right-seeeduino_xiao_ble-zmk.uf2for right half to the new USB device. The device will disconnect automatically;
- Turn ON both halves;
- Press the RST button of both halves SIMULTANEOUSLY to pair them;
- Try to connect it to the PC via Bluetooth and test that everything works;
- Turn OFF both halves.
Test the PCB
If you do not have a multimeter, connect the battery on the left half and turn it on. Verify it shows up as a Bluetooth keyboard. If it does not and only shows up when connected to USB power, you probably need to re-solder the underside pads. That is also the likely cause for the right half not connecting on battery and only working when connected to USB power.
After that, you can optionally verify the matrix. Connect both halves to your PC and either use tweezers to short each socket or insert and press switches. Please brace the sockets (with your fingers) when inserting the switches!
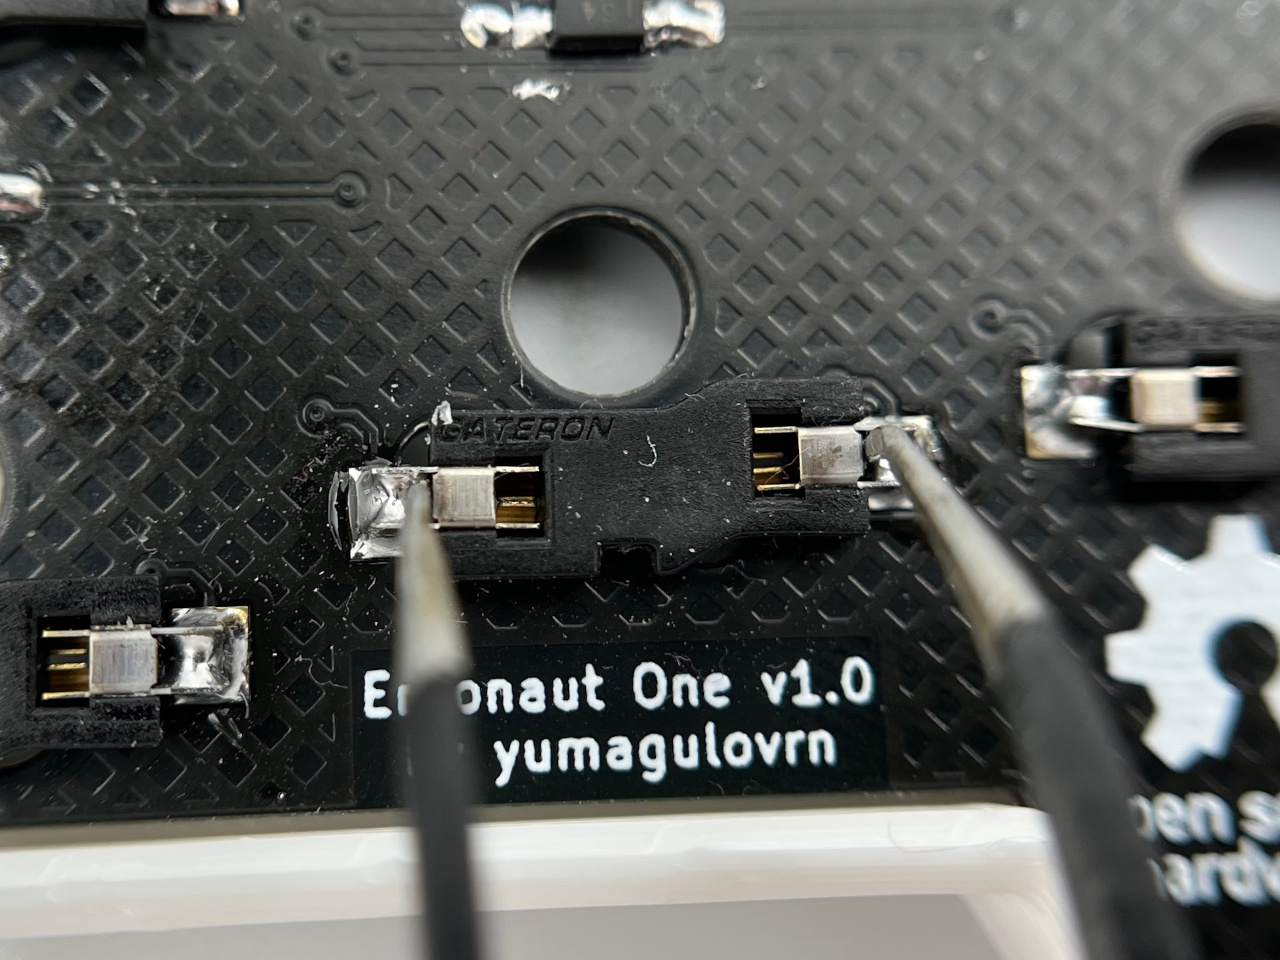
Keep in mind that some positions in the matrix are modifiers and will not do anything when pressed on their own. A keyboard tester website will work for modifiers, but it will not detect layers.
Matrix verification can be performed after inserting all the switches into the top case, but it is best done before mounting the bottom.
Assemble your case
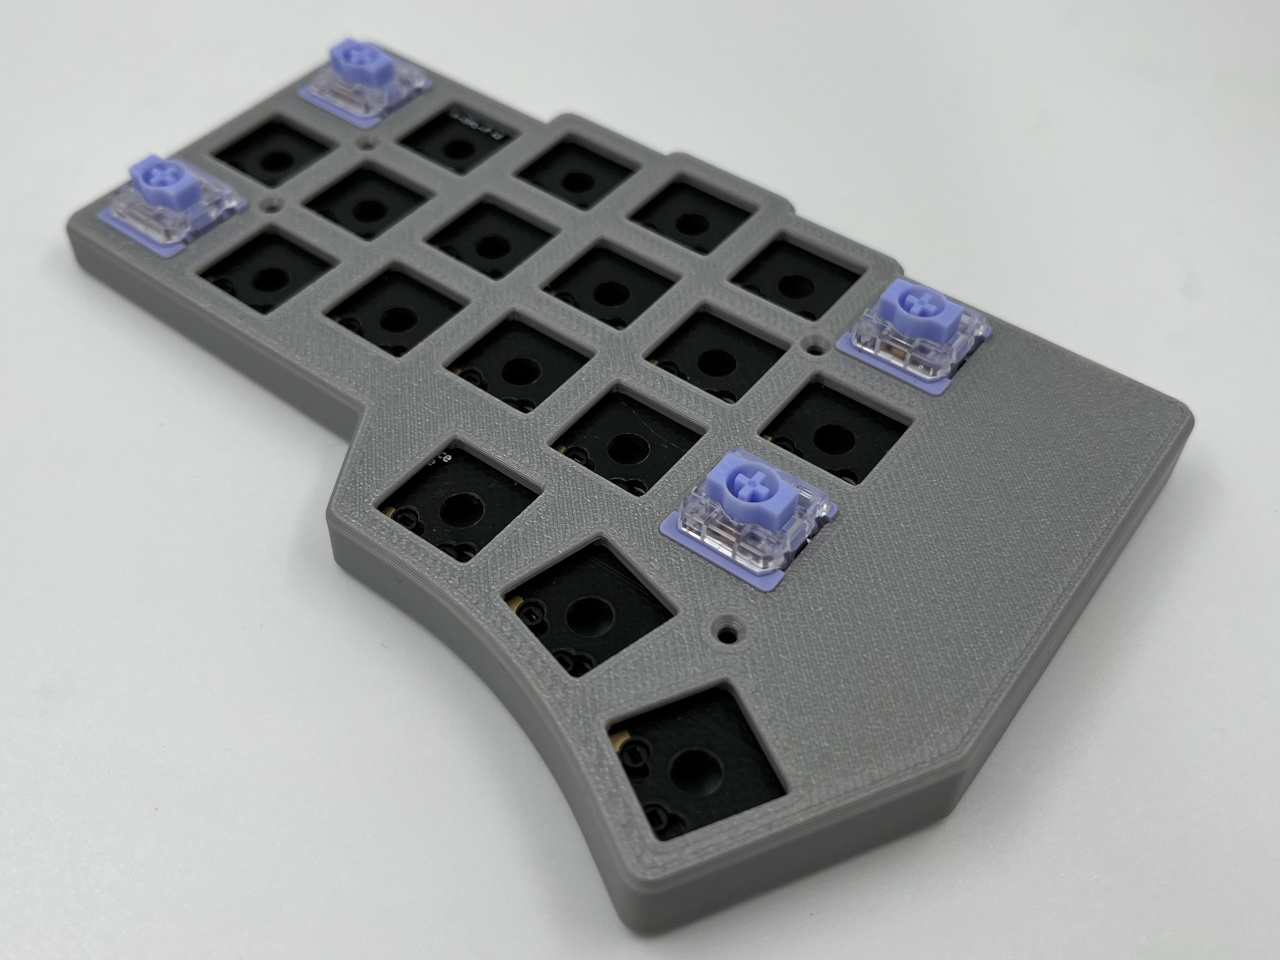
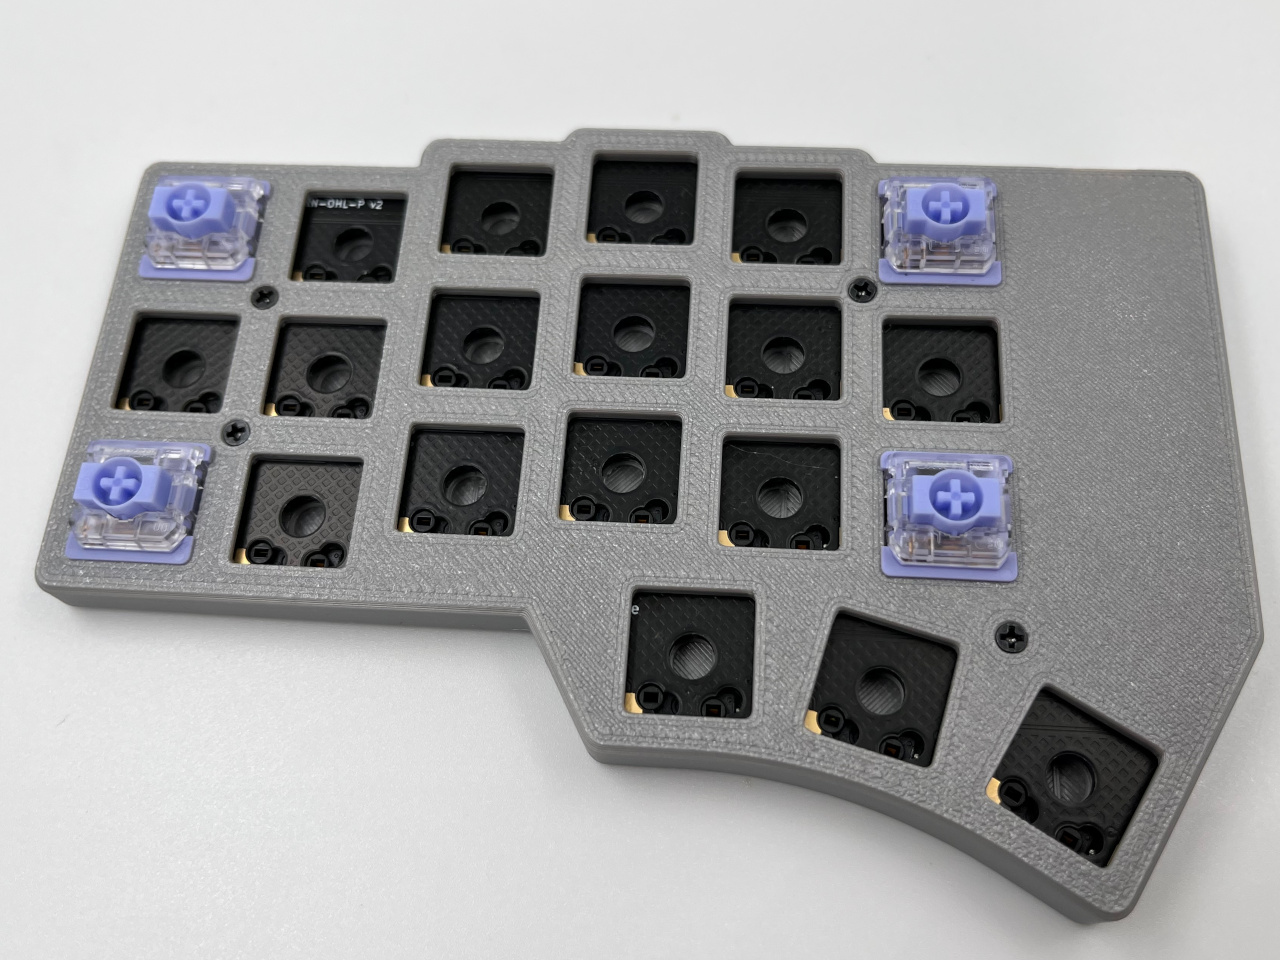
Start by inserting the PCB inside the top part of the case.
Flip the keyboard, and insert some switches while holding the PCB against the top case. This will fix the PCB in place for further build.
Flip the keyboard again, and insert the bottom part of the case.
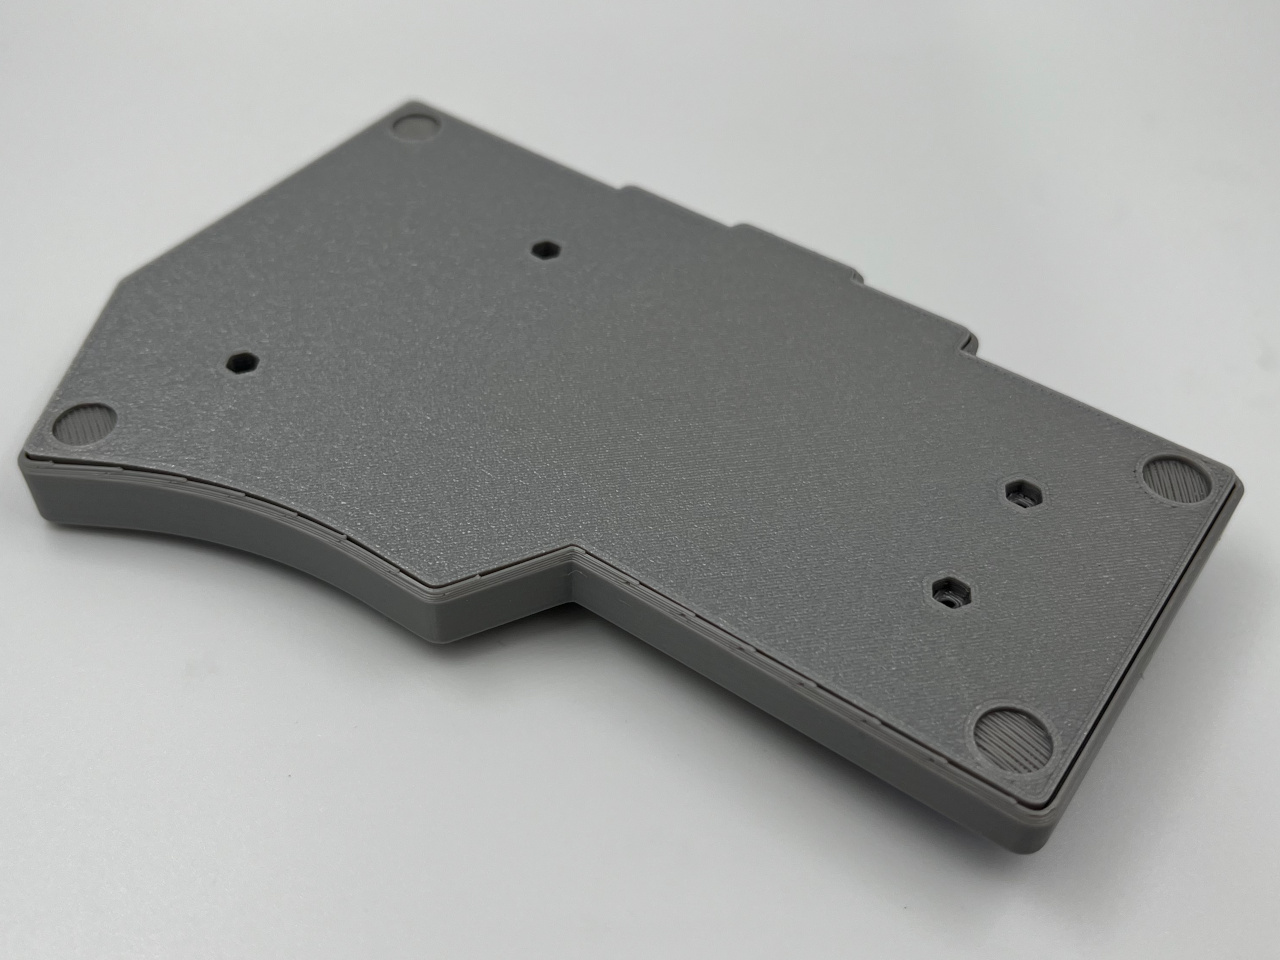
Now the tricky part - you should place hex nuts in the hex slots on the bottom side of the case, and insert screws from the top side of the case.
Note: please do not overtighten the screws!
| Top | Bottom |
|---|---|
 | 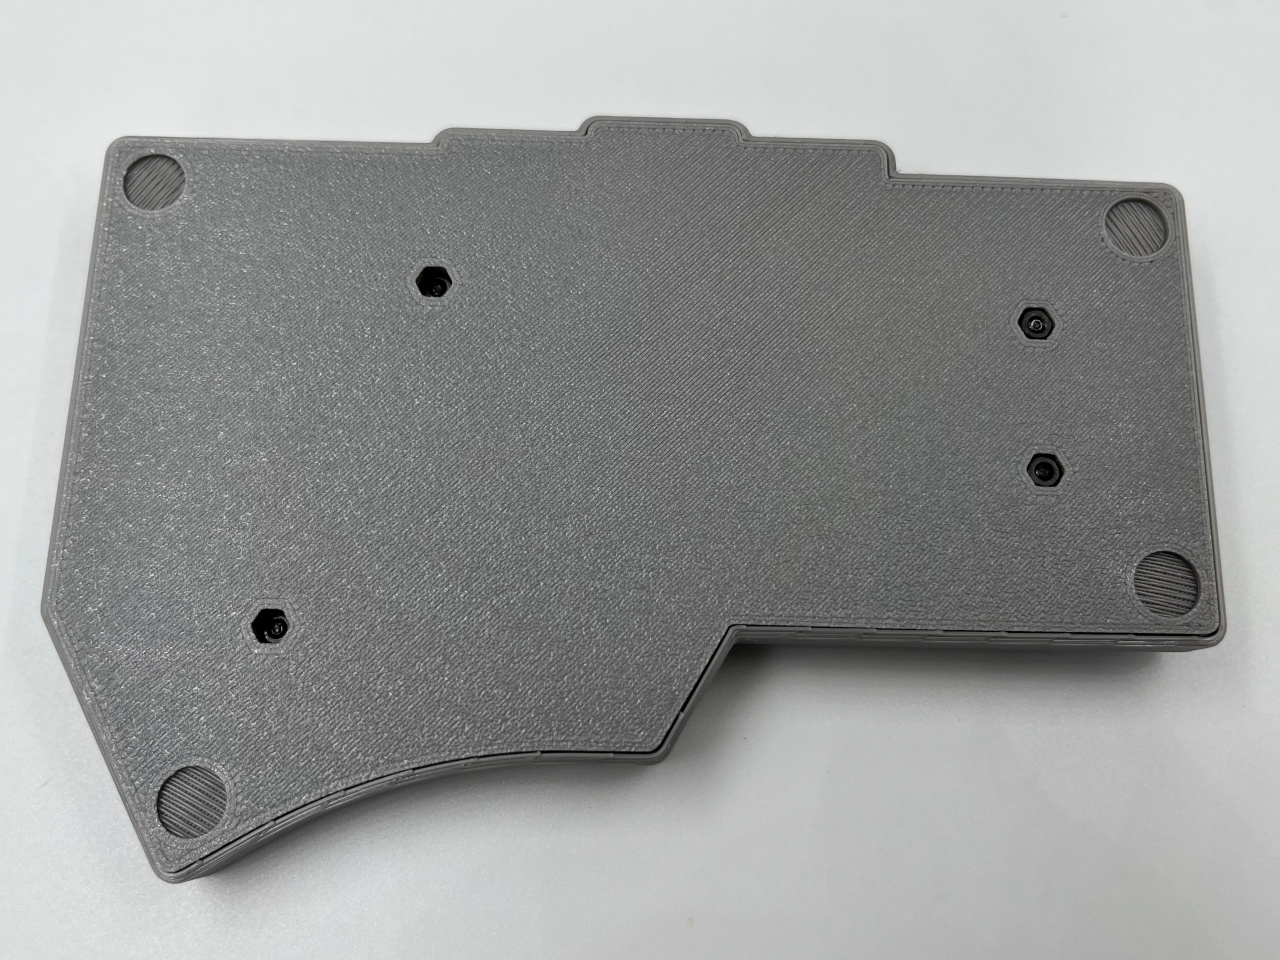 |
Install rubber bump-ons on the bottom side of the case.

Now insert the rest of the switches into the case.
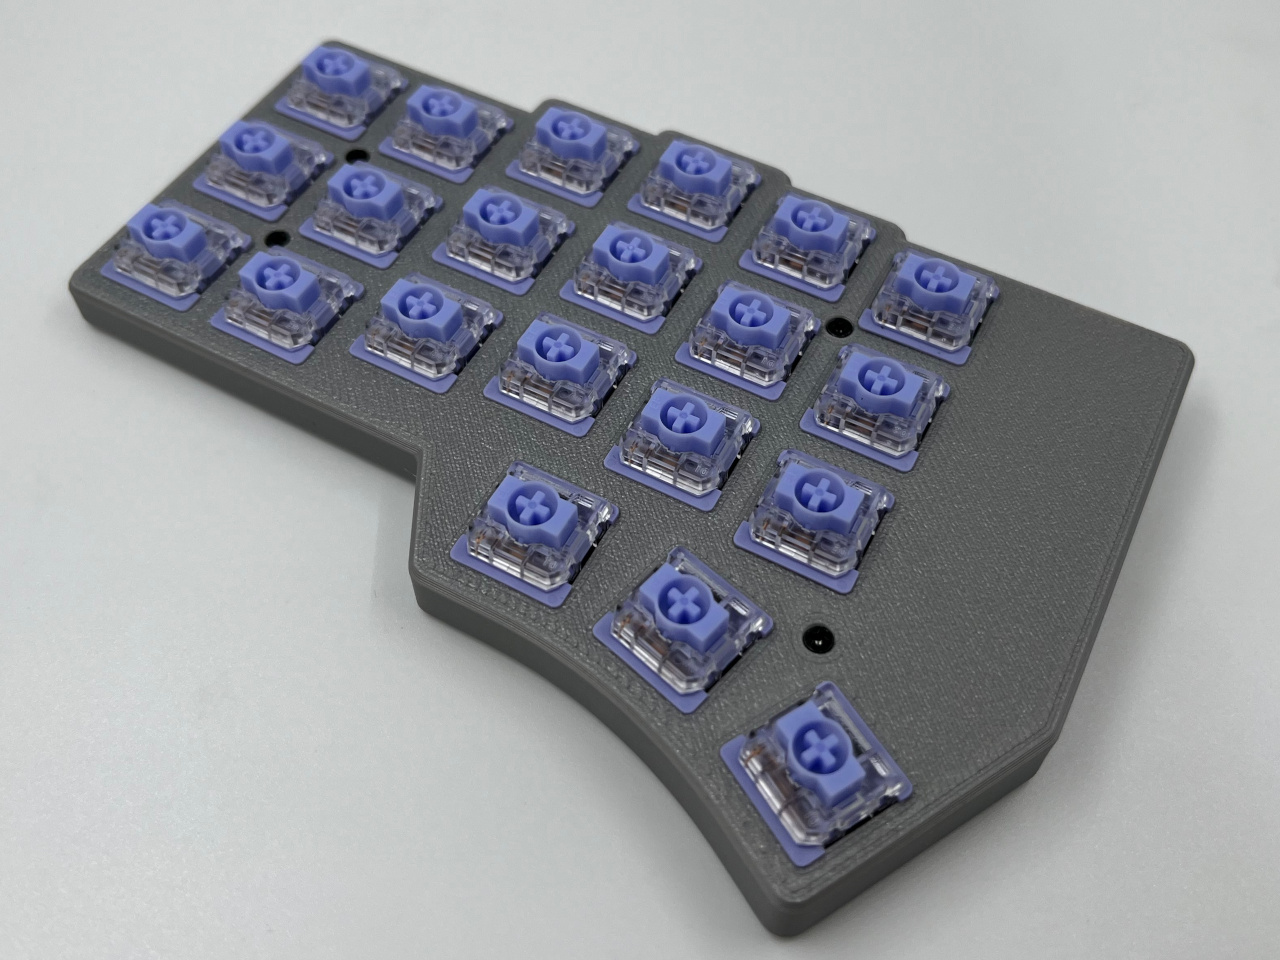
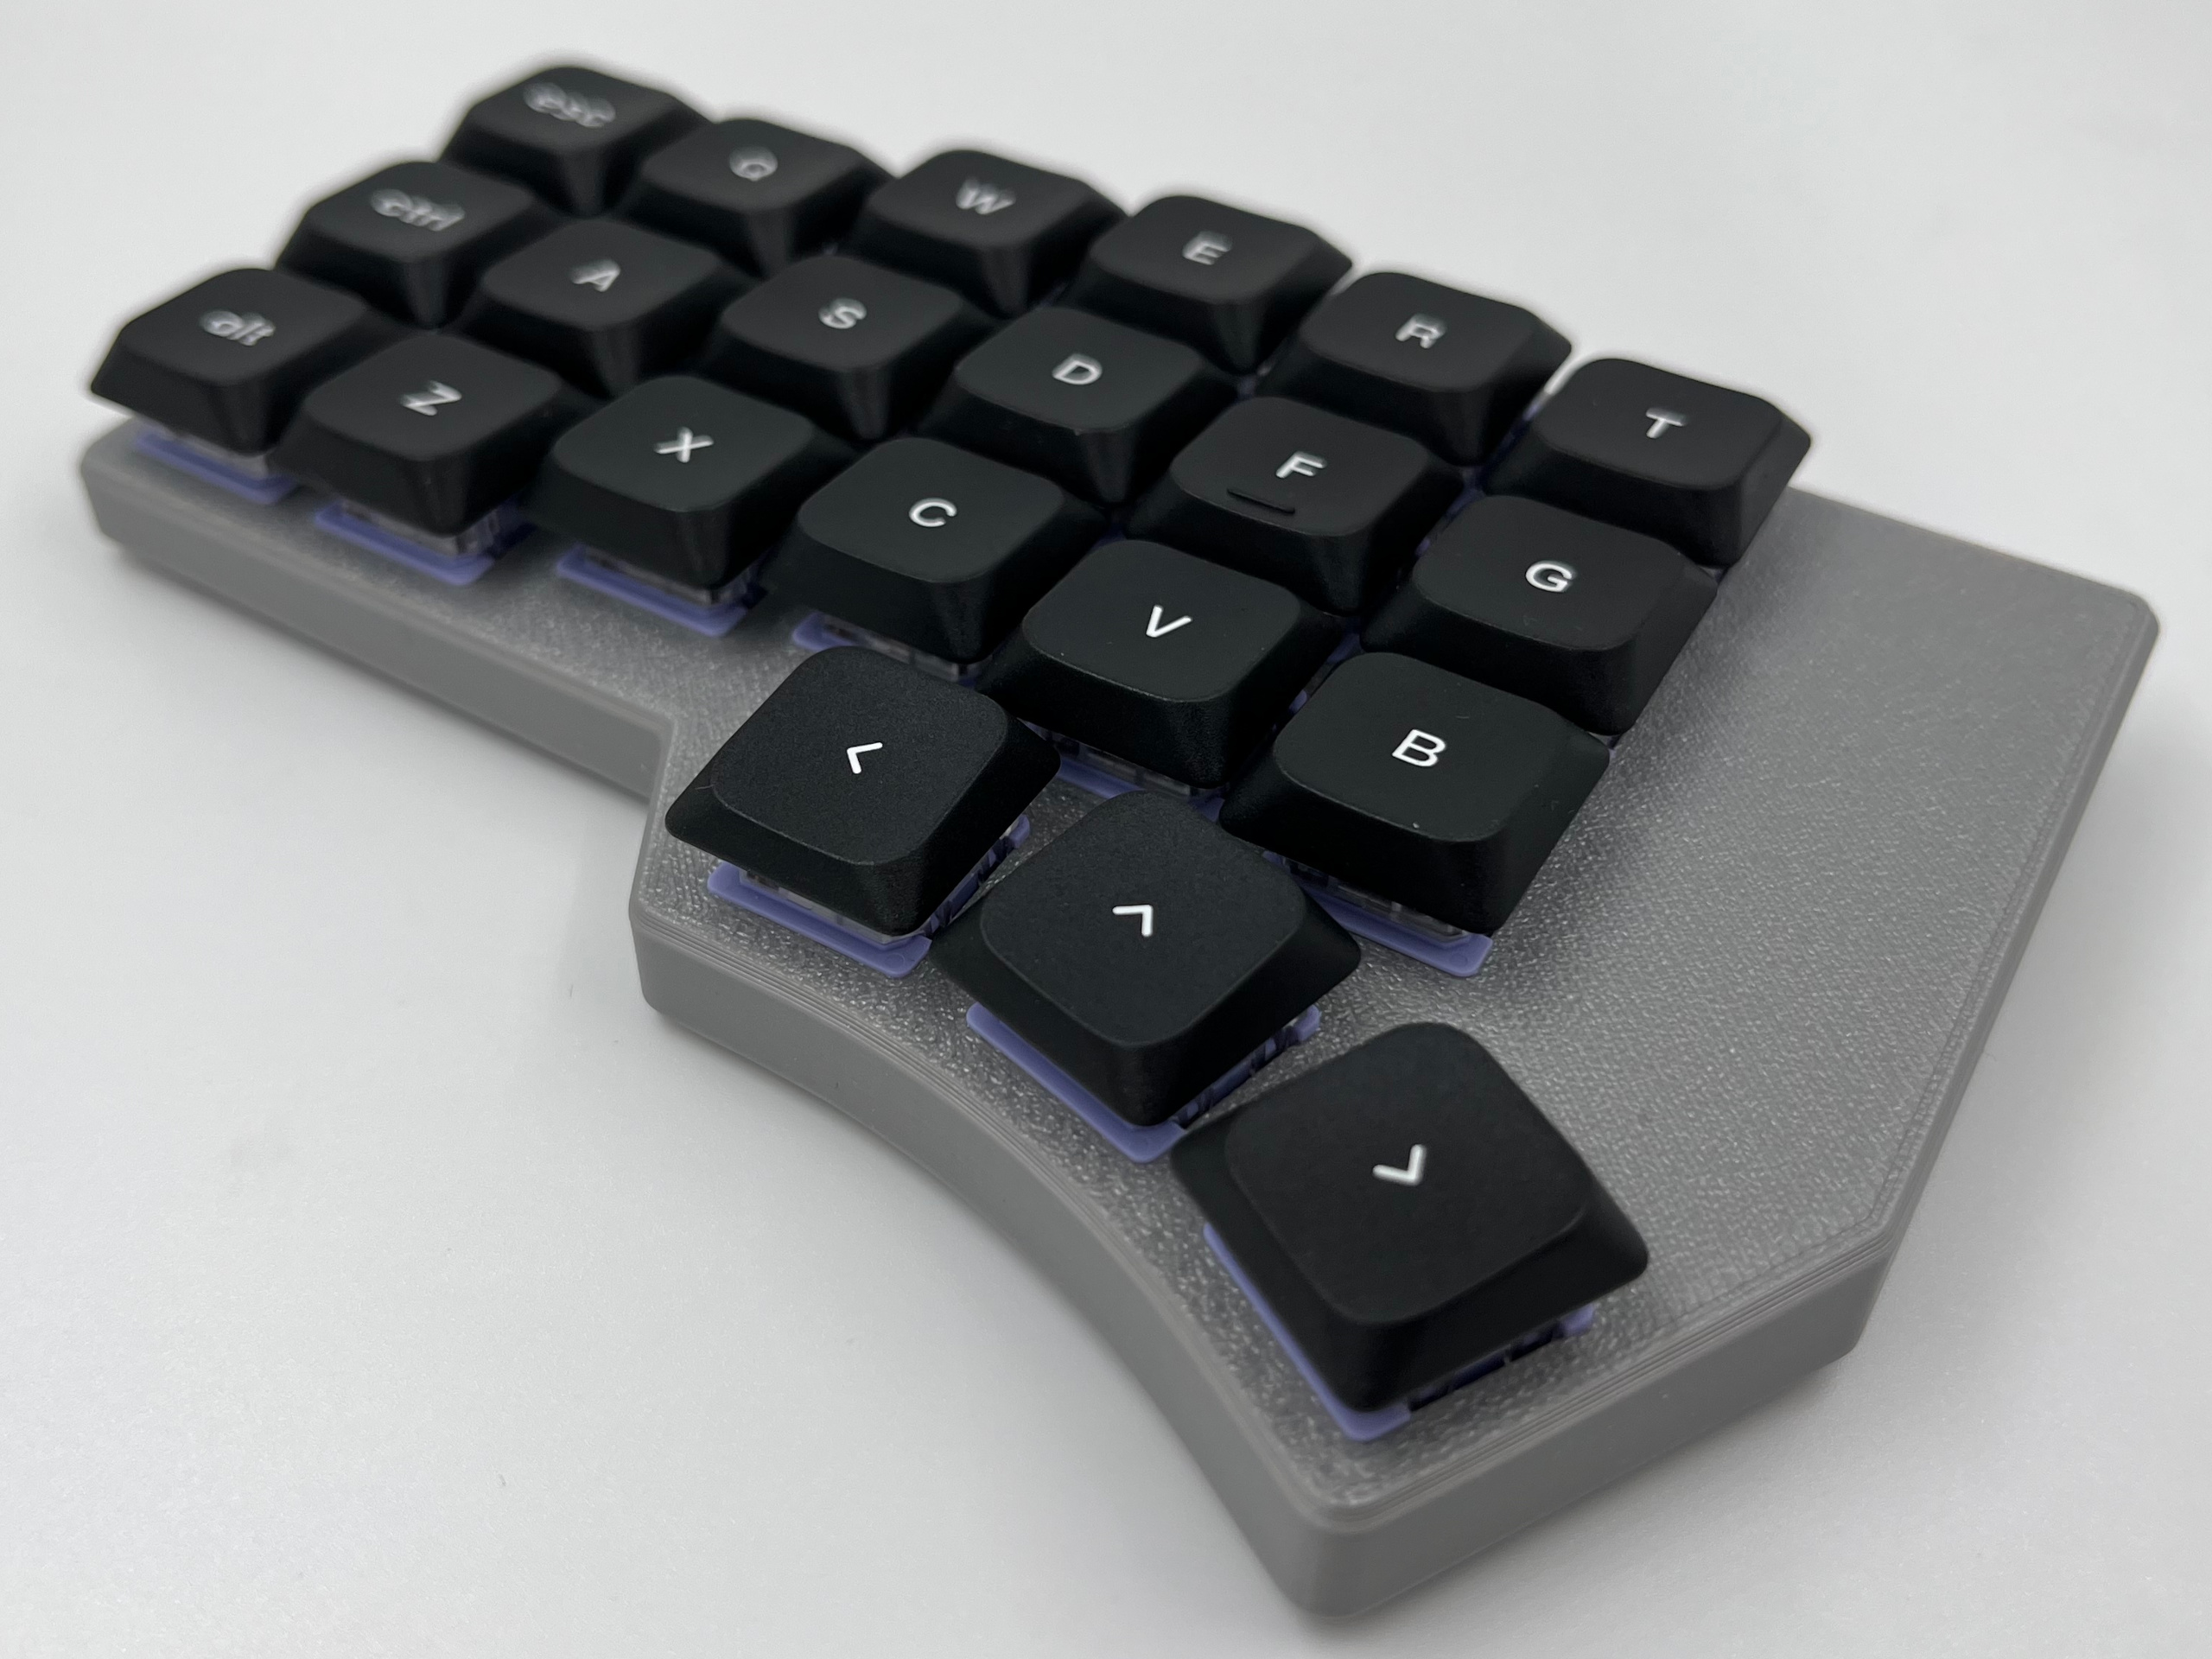
Now put your favorite keycaps, repeat the steps for the second half of the keyboard, turn it on, and enjoy your freshly assembled Ergonaut One!